Arduino Continuous Rotation (360 degree) Servo Driver Implementation
January 16, 2017
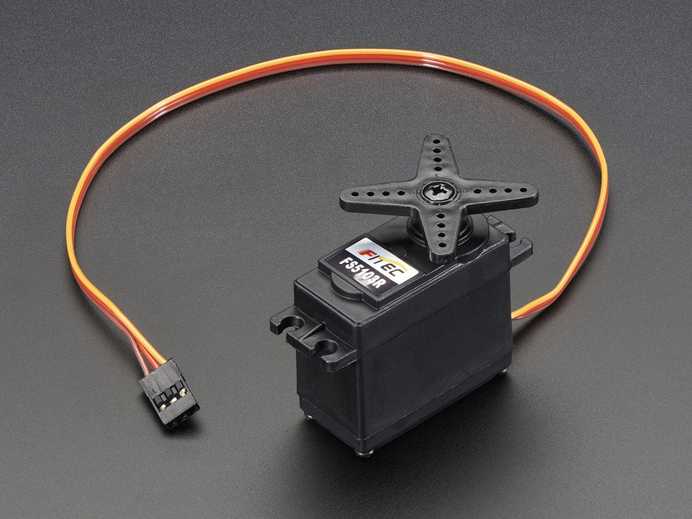
This servo rotates fully forward or backward instead of moving to a position. You can use any servo code, hardware or library to control these servos. Good for making simple moving robots. Comes with four different horns.
To control with an Arduino, I suggest connecting the control wire to pin 9 or 10 and using the Servo library included with the Arduino IDE. Position “90” (1.5ms pulse) is stopped, “180” (2ms pulse) is full speed forward, “0” (1ms pulse) is full speed backward.
All the code is available in the GitHub repo.
https://github.com/robertmeisner/useful-drivers
Interface
Even though we have used continuous servos, the interface is universal enough to handle any other motor (ie. DC brushed).
/**
 * Motor Driver Interface
 * @file motor_driver.h
 * @brief Motor device driver interface for the robot project.
 * @author Robert Meisner <robert@catchit.pl>
 * @version 1.0 2016-12-22
 */

namespace CatchIT
{
class MotorDriver
{
  public:
    virtual void init() = 0;
    /**
    * @brief Change the speed of the motor.
    * @param speed The new speed of the motor.
    *  Valid values are between -255 and 255.
    *  Use positive values to run the motor forward,
    *  negative values to run it backward and zero to stop the motor.
    */
    virtual void setSpeed(int speed) = 0;

    /**
    * @brief Return the current speed of the motor.
    * @return The current speed of the motor with range -255 to 255.
    */
    virtual int getSpeed() const = 0;

  protected:
    static const int MIN_SPEED = -255;
    static const int MAX_SPEED = 255;
};
};
Implementation
/**
 * Continous Servo Motor Driver Interface
 * @file continous_servo_motor_driver.h
 * @brief Continous Servo Motor device driver implementation for the robot project.
 * @author Robert Meisner <robert@catchit.pl>
 * @version 1.0 2016-12-22
 */

#include "motor_driver.h"
#include <Servo.h>

namespace CatchIT
{
    class ContinousServoMotorDriver : public MotorDriver
    {
    public:
        /*
         * @brief Class constructor.
         * @param pin number of pin
         */
        ContinousServoMotorDriver(int pin)
            : MotorDriver(),pin(pin), currentSpeed(0)
        {
			//Serial.println("Motor constructor");
		}
		void init(){
			motor.attach(pin);
			motor.write(scaleRange(currentSpeed));
		}
        void setSpeed(int speed)
        {
			currentSpeed = speed;
			motor.write(scaleRange(speed));
        }

        int getSpeed() const
        {
            return currentSpeed;
        }

    private:

        Servo motor;
		int pin;
        int currentSpeed;
		/**
		* Scales robot's <-255,255> range to servo's <0;180>
		*/
		int scaleRange(int x){

			int speed=0;
			int max_new=180;
			int min_new=0;
			if(x==0)
				speed= 90;
			int rangeOld=MAX_SPEED-MIN_SPEED;
			//Serial.println(x);
			//Serial.println(rangeOld);
			int rangeNew = (max_new - min_new);
			//Serial.println(rangeNew);
			/**
			*        (b-a)(x - min)
			* f(x) = -------------- + a
			*          max - min
			*/
			speed = ((((float)x - (float)MIN_SPEED) * (float)rangeNew) / (float)rangeOld) + (float)min_new;
			//Serial.println(speed);

			return speed;
		}
    };
};
Example Arduino Code
/*
 Motor
 Runs a motor both directions at various speeds.
*/

#include "continous_servo_motor_driver.h"
int motorPin = 8;
UsefulDrivers::ContinousServoMotorDriver *driver = new UsefulDrivers::ContinousServoMotorDriver(motorPin);
// the setup function runs once when you press reset or power the board
void setup()
{
    // initialize serial communication at 9600 bits per second:
    Serial.begin(9600);
    // put your setup code here, to run once:
    driver->init();
}
// the loop function runs over and over again forever
void loop()
{
    // put your main code here, to run repeatedly:
    driver->setSpeed(255);
    Serial.println("Going forward at max speed for 3000ms");
    delay(3000);

    driver->setSpeed(0);
    Serial.println("Stopped for 1000ms");
    delay(1000);

    driver->setSpeed(-255/2);
    Serial.println("Going backward at HALF a speed for 3000ms");
    delay(3000);

    driver->setSpeed(0);
    Serial.println("Stopped for 500ms");
    delay(500);
    // wait for 30 milliseconds
}